Create CRUD application using laravel and InertiaJS (vue)
Introduction
Laravel has long been the preferred choice for many PHP developers to kickstart web application development. Recently, it has introduced a new way to create a fully functional web application using a starter kit that enables the creation of a single-page application (SPA) with just a few commands.
In this blog post, we will explore how to create a notes web application using Inertia.js and Vue.js. Inertia.js is a server-side framework for building SPAs using Laravel, while Vue.js is a popular JavaScript framework that simplifies the creation of dynamic web user interfaces. Together, Inertia.js and Vue.js provide a powerful combination for building modern web applications quickly and efficiently. So, let’s dive in and see how they work together to create a seamless user experience.
1. Initialize the application
For Laravel development, the Docker tool Sail provides a convenient solution by automatically installing all required dependencies, including Nginx, MySQL, PHP, and Meilisearch. With Sail, setting up your development environment is a breeze.
To get started, simply run the following commands to install and launch Sail within your Laravel project directory.
curl -s "https://laravel.build/laravel-notes" | bash
cd laravel-notes
./vendor/bin/sail up -d
The last command will take some minutes ( depending on your connection ) if you run for the first time, as it will pull the docker images for you. Adding -d at the end of the command will run the docker containers as deamons ( in the background ). If you want to see the logs of the docker containers run the following command
./vendor/bin/sail logs -f
To finish this step run the initial migrtions of laravel
./vendor/bin/sail artisan migrate
2. Install Breeze and Inertia
Laravel breeze provides an easy way to scaffold authentication controllers and views with just one command . It lets you choose the frontend libraries of your own either laravel blades , react or vue .
To instal laravel breeze , let’s install via composer
./vendor/bin/sail composer require laravel/breeze --dev
After installing laravel/breeze let’s install Inertia which is a great tool for scaffolding a single page React and Vue applications using classic server side routing. Let’s read this paragraph from Laravel docs
Inertia lets you enjoy the frontend power of React and Vue combined with the incredible backend productivity of Laravel and lightning-fast Vite compilation.
./vendor/bin/sail artisan breeze:install vue --typescript
I have been writing ./vendor/bin/sail a lot , let’s add it as an alias.
Add this line into your .bashrc or .zshrc
# sail alias
alias sail='[ -f sail ] && bash sail || bash vendor/bin/sail'
Finally you need to run the migrations and start the frontend web application and see it running.
sail artisan migrate
sail npm install
sail npm run dev
Now you can take a look at your web application at http://localhost.
Let’s register a new user to start our application with.
3. Add the model
Let’s add our simple model that we are going to CRUD it. Adding -a option will create almost everything we need to this model :
- Database Migration class
- Restful Controller
- Eloquent Model
sail artisan make:model -a Note
Go to the new migration class and add change the schema to add title and description columns
public function up(): void
{
    Schema::create('notes', function (Blueprint $table) {
        $table->id();
        $table->string('title');
        $table->text('description');
        $table->timestamps();
    });
}
Also change the factory to be able to seed the database anytime.
// database/factories/NoteFactory.php
public function definition(): array
{
    return [
        'title' => fake()->words(3, asText: true),
        'description' => fake()->words(10, asText: true)
    ];
}
Then run the migration to update the database schema
sail artisan migrate
And finally let’s add this line to routes/web.php , to add resourful routes to our notes application.
Route::middleware(['auth', 'verified'])->resource('notes', NoteController::class);
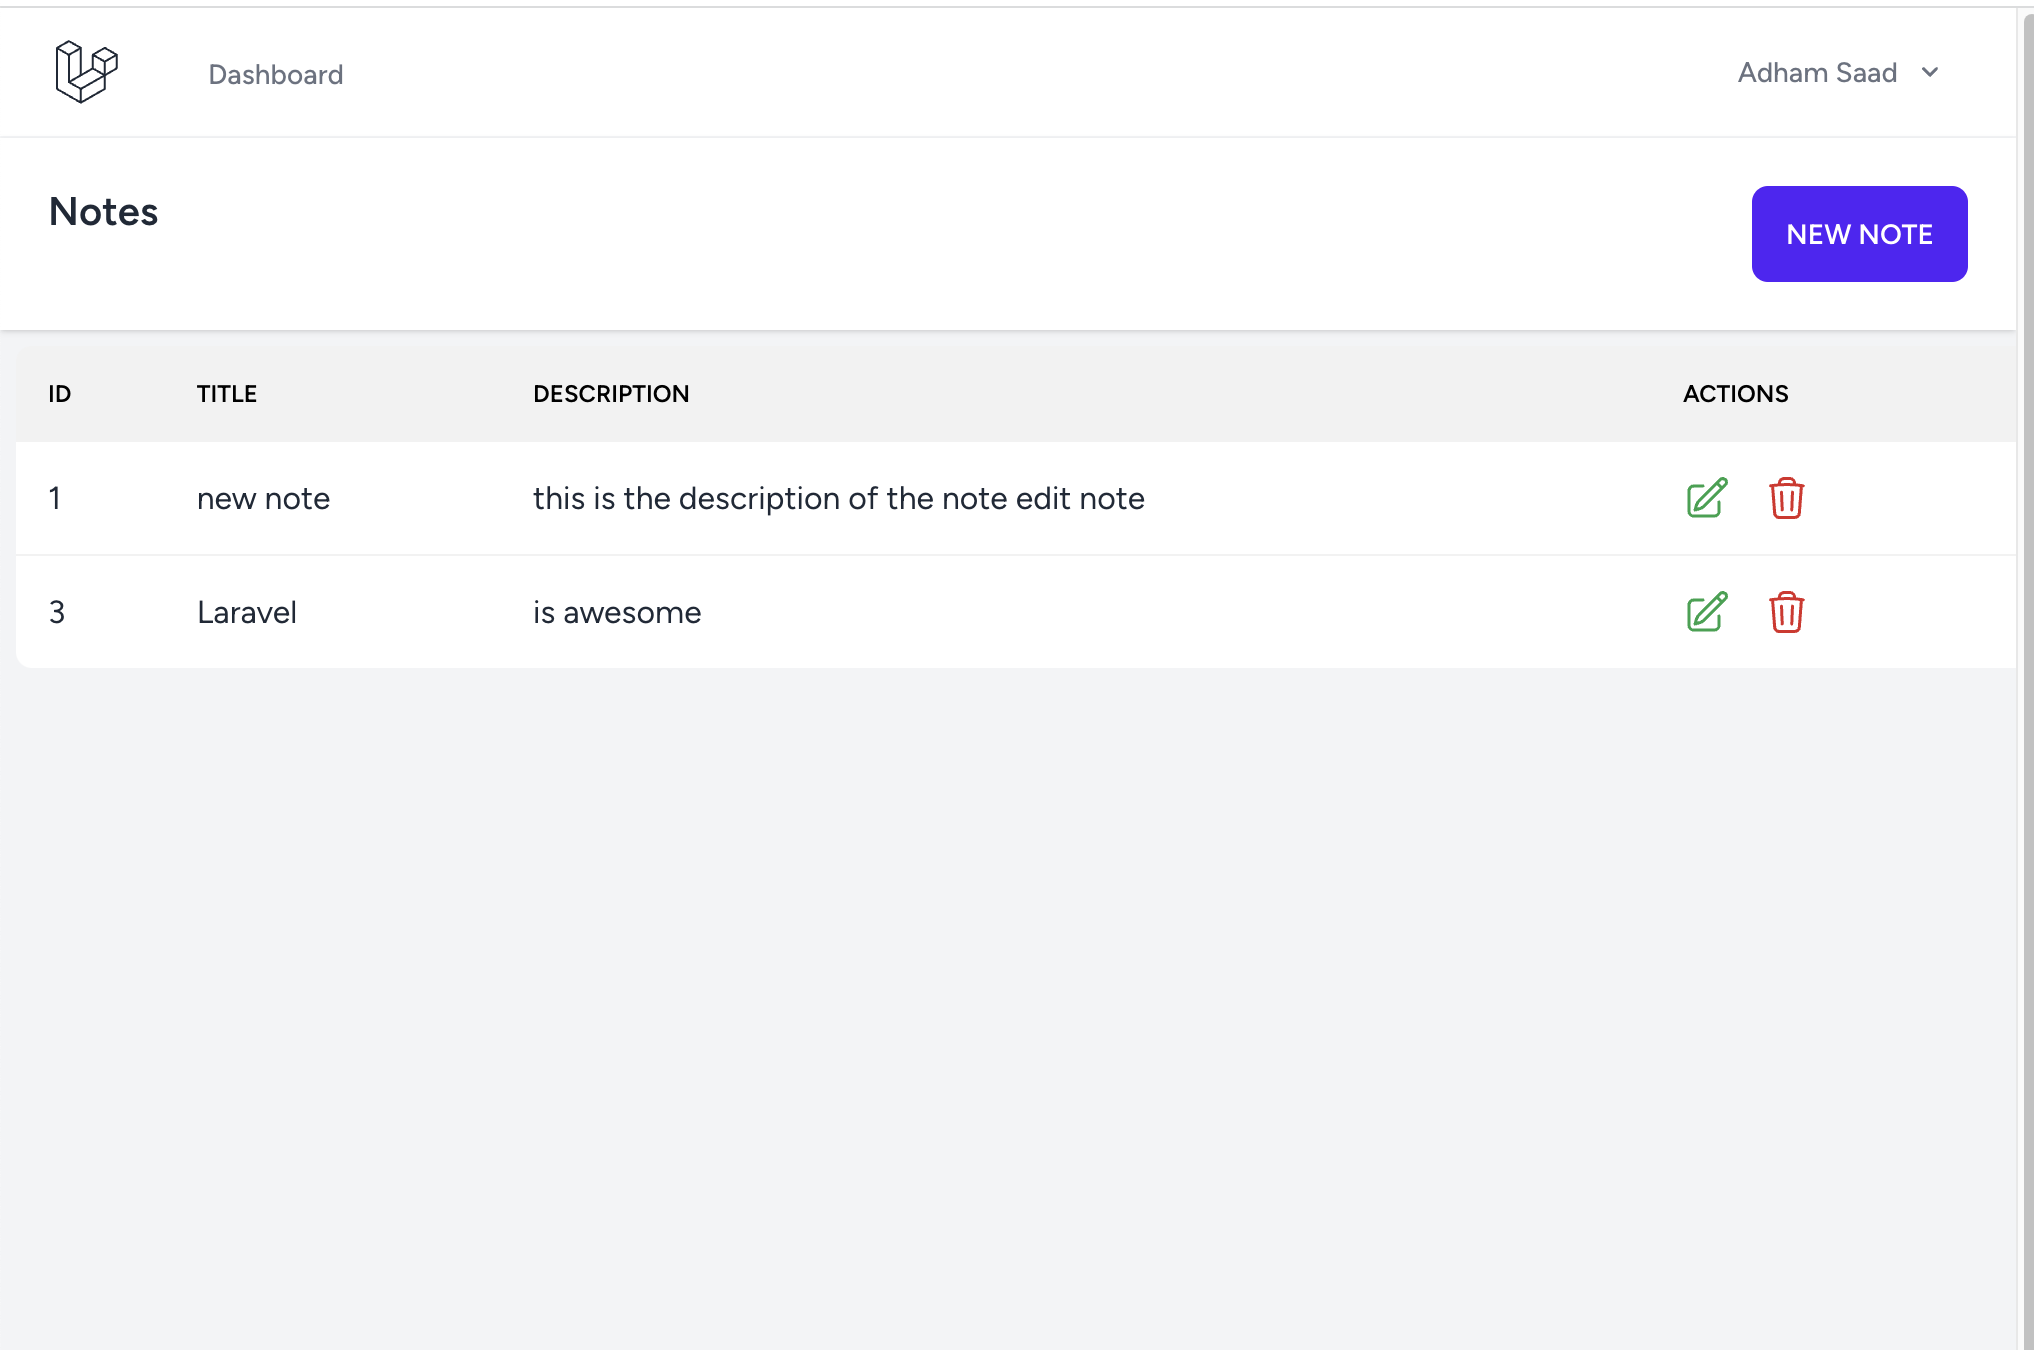
4. Listing and Delete
Now go to app/Http/Controllers/NoteController.php and import Inertia facade at the head of the file.
use Inertia\Inertia;
Then change index function to fetch the notes from the database.
/**
 * Display a listing of the resource.
 */
public function index()
{
    return Inertia::render('Notes/List', [
        'notes' => Note::all()
    ]);
}
Create new file Notes/List.vue in resources/js/Pages/ to hold the vue component of notes listing.
Install @heroicons/vue beforehand to add catchy icons to our view.
<script setup lang="ts">
import AuthenticatedLayout from '@/Layouts/AuthenticatedLayout.vue';
import { Head, Link, useForm } from '@inertiajs/vue3';
import { PencilSquareIcon, TrashIcon } from "@heroicons/vue/24/outline";

defineProps({
    notes: Object
});


const formDelete = useForm({})
function deleteNote(id: string) {
    if (confirm('Are you sure you want to delete this note ?')) {
        formDelete.delete(route('notes.destroy', id));
    }
}

</script>

<template>
    <Head title="Notes" />

    <AuthenticatedLayout>
        <template #header>
            <div class="flex justify-between">
                <div class="title">
                    <h2 class="font-semibold text-xl text-gray-800 dark:text-gray-200 leading-tight">Notes</h2>
                </div>
                <div class="button-container">
                    <button class="btn btn-primary ml-2">
                        <Link :href="route('notes.create')">New Note</Link>
                    </button>
                </div>
            </div>
        </template>

        <div class="max-w-7xl mx-auto">
            <table class="table table-auto w-full m-2 p-2">
                <thead class="table-head">
                    <tr class="text-black font-semibold">
                        <th>ID</th>
                        <th>Title</th>
                        <th>Description</th>
                        <th>Actions</th>
                    </tr>
                </thead>
                <tbody>
                    <tr v-for="note in notes" :key="note.id" :id="`row-${note.id}`">
                        <td>{{ note.id }}</td>
                        <td>{{ note.title }}</td>
                        <td>{{ note.description }}</td>
                        <td>
                            <div class="flex justify-start">
                                <div class="edit-btn w-6 mr-4">
                                    <Link :href="route('notes.edit', {note: note.id})" >
                                        <PencilSquareIcon class="w-6 h-6 text-green-600" />
                                    </Link>
                                </div>
                                <div class="delete-btn w-6 mr-4">
                                    <TrashIcon @click="deleteNote(note.id)" class="w-6 h-6 text-red-600 flex-1 cursor-pointer" />
                                </div>
                            </div>
                        </td>
                    </tr>
                </tbody>
            </table>
        </div>
    </AuthenticatedLayout>
</template>
To make sure the listing works correctly, run the following command into artisan tinker .
Note::factory()->count(10)->create()
Finally go to NotesController and edit destroy function to enable the delete action.
// app/Http/Controllers/NoteController.php

public function destroy(Note $note)
{
    $note->delete();
}
5. Create and Edit Form
Let’s edit the functions in the controller first.
// app/Http/Controllers/NoteController.php

public function create()
{
    return Inertia::render('Notes/Form', [
        'isEdit' => false,
        'formTitle' => 'Create Note'
    ]);
}

public function store(Request $request)
{
    Note::create(
        $request->validate([
            'title' => ['required', 'max:50'],
            'description' => ['required', 'max:400']
        ])
    );
    return to_route('notes.index');
}

public function edit(Note $note)
{
    return Inertia::render('Notes/Form', [
        'isEdit' => true,
        'formTitle' => 'Edit Note',
        'note' => $note
    ]);
}

public function update(Request $request, Note $note)
{
    $note->update(
        $request->validate([
            'title' => ['required', 'max:50'],
            'description' => ['required', 'max:400']
        ])
    );
    return to_route('notes.index');
}
And now add the form component that will handle the view functionality of both edit and create actions.
<script setup lang="ts">
import AuthenticatedLayout from '@/Layouts/AuthenticatedLayout.vue';
import { Head } from '@inertiajs/vue3';
import { useForm } from '@inertiajs/vue3';

const props = defineProps({
    formTitle: String,
    isEdit: {
        type: Boolean,
        default: false
    },
    note: {
        type: Object,
        default: () => ({}),
    },
})

const form = useForm({
    title: props.isEdit ? props.note.title : null,
    description: props.isEdit ? props.note.description : null
})

function saveForm() {
    if (props.isEdit) {
        form.put(route('notes.update', props.note.id))
    } else {
        form.post(route('notes.store'))
    }
}

</script>


<template>
    <Head title="Notes" />

    <AuthenticatedLayout>
        <template #header>
            <div class="flex justify-between">
                <div class="title">
                    <h2 class="font-semibold text-xl text-gray-800 dark:text-gray-200 leading-tight">{{ formTitle }}</h2>
                </div>
            </div>
        </template>

        <div class="max-w-6xl mx-auto w-96">
            <form @submit.prevent="saveForm">
                <div class="form-control">
                    <label for="title" class="label">
                        <span class="label-text text-xl">Title</span>
                        <span v-if="form.errors.title" class="label-text-alt text-error font-semibold text-lg title-error hidden"></span>
                    </label>
                    <input type="text" name="title" id="title" class="input input-bordered w-full" required v-model="form.title">
                </div>
                <div class="form-control">
                    <label for="description" class="label">
                        <span class="label-text text-xl">Description</span>
                        <span v-if="form.errors.description" class="label-text-alt text-error font-semibold text-lg description-error hidden"></span>
                    </label>
                    <textarea class="textarea textarea-bordered h-24" placeholder="Description" required v-model="form.description"></textarea>
                </div>
                <div class="form-control mt-2">
                    <button type="submit" class="btn btn-primary">Save</button>
                </div>
            </form>
        </div>
    </AuthenticatedLayout>
</template>
Here we are using only one Vue component to hold edit and create form , with isEdit boolean flag to differentiate between the two scenarios, if it is true then we are in the edit state and we are using put HTTP method instead of post . Both are available as functions in useForm component from inertiajs/vue3.
Using the same flag , we are loading the note object sent from NoteController::edit .